Maintaining channels takes time, especially if you’re working with content from different sources. But you can automate the routine. In this article, we will look at examples of how to stylize (readjust), process, and translate text using Junction Bot and the network, and then automatically post it on your Telegram channels.
You can apply completely different text processing according to your needs. Let’s break down the main scripts.
What serves as the source?
Content sources are chats, channels, and groups from which the bot sends messages. The flexibility of the system allows you to configure a process so that a single chat or an entire folder with different chats can be a source.
Scenario 1: Creative rebalancing and style change
One of the most popular cases is changing the style of your post to what you need. You can turn a dry news post into a joke, sarcasm, or official statement.
Example: "In the style of Woody Allen"
For the demonstration, we took a plain text and asked the neurose to rewrite it in a specific way. In the settings, we used the following program:
Process the following text in the style of Woody Allen’s jokes:
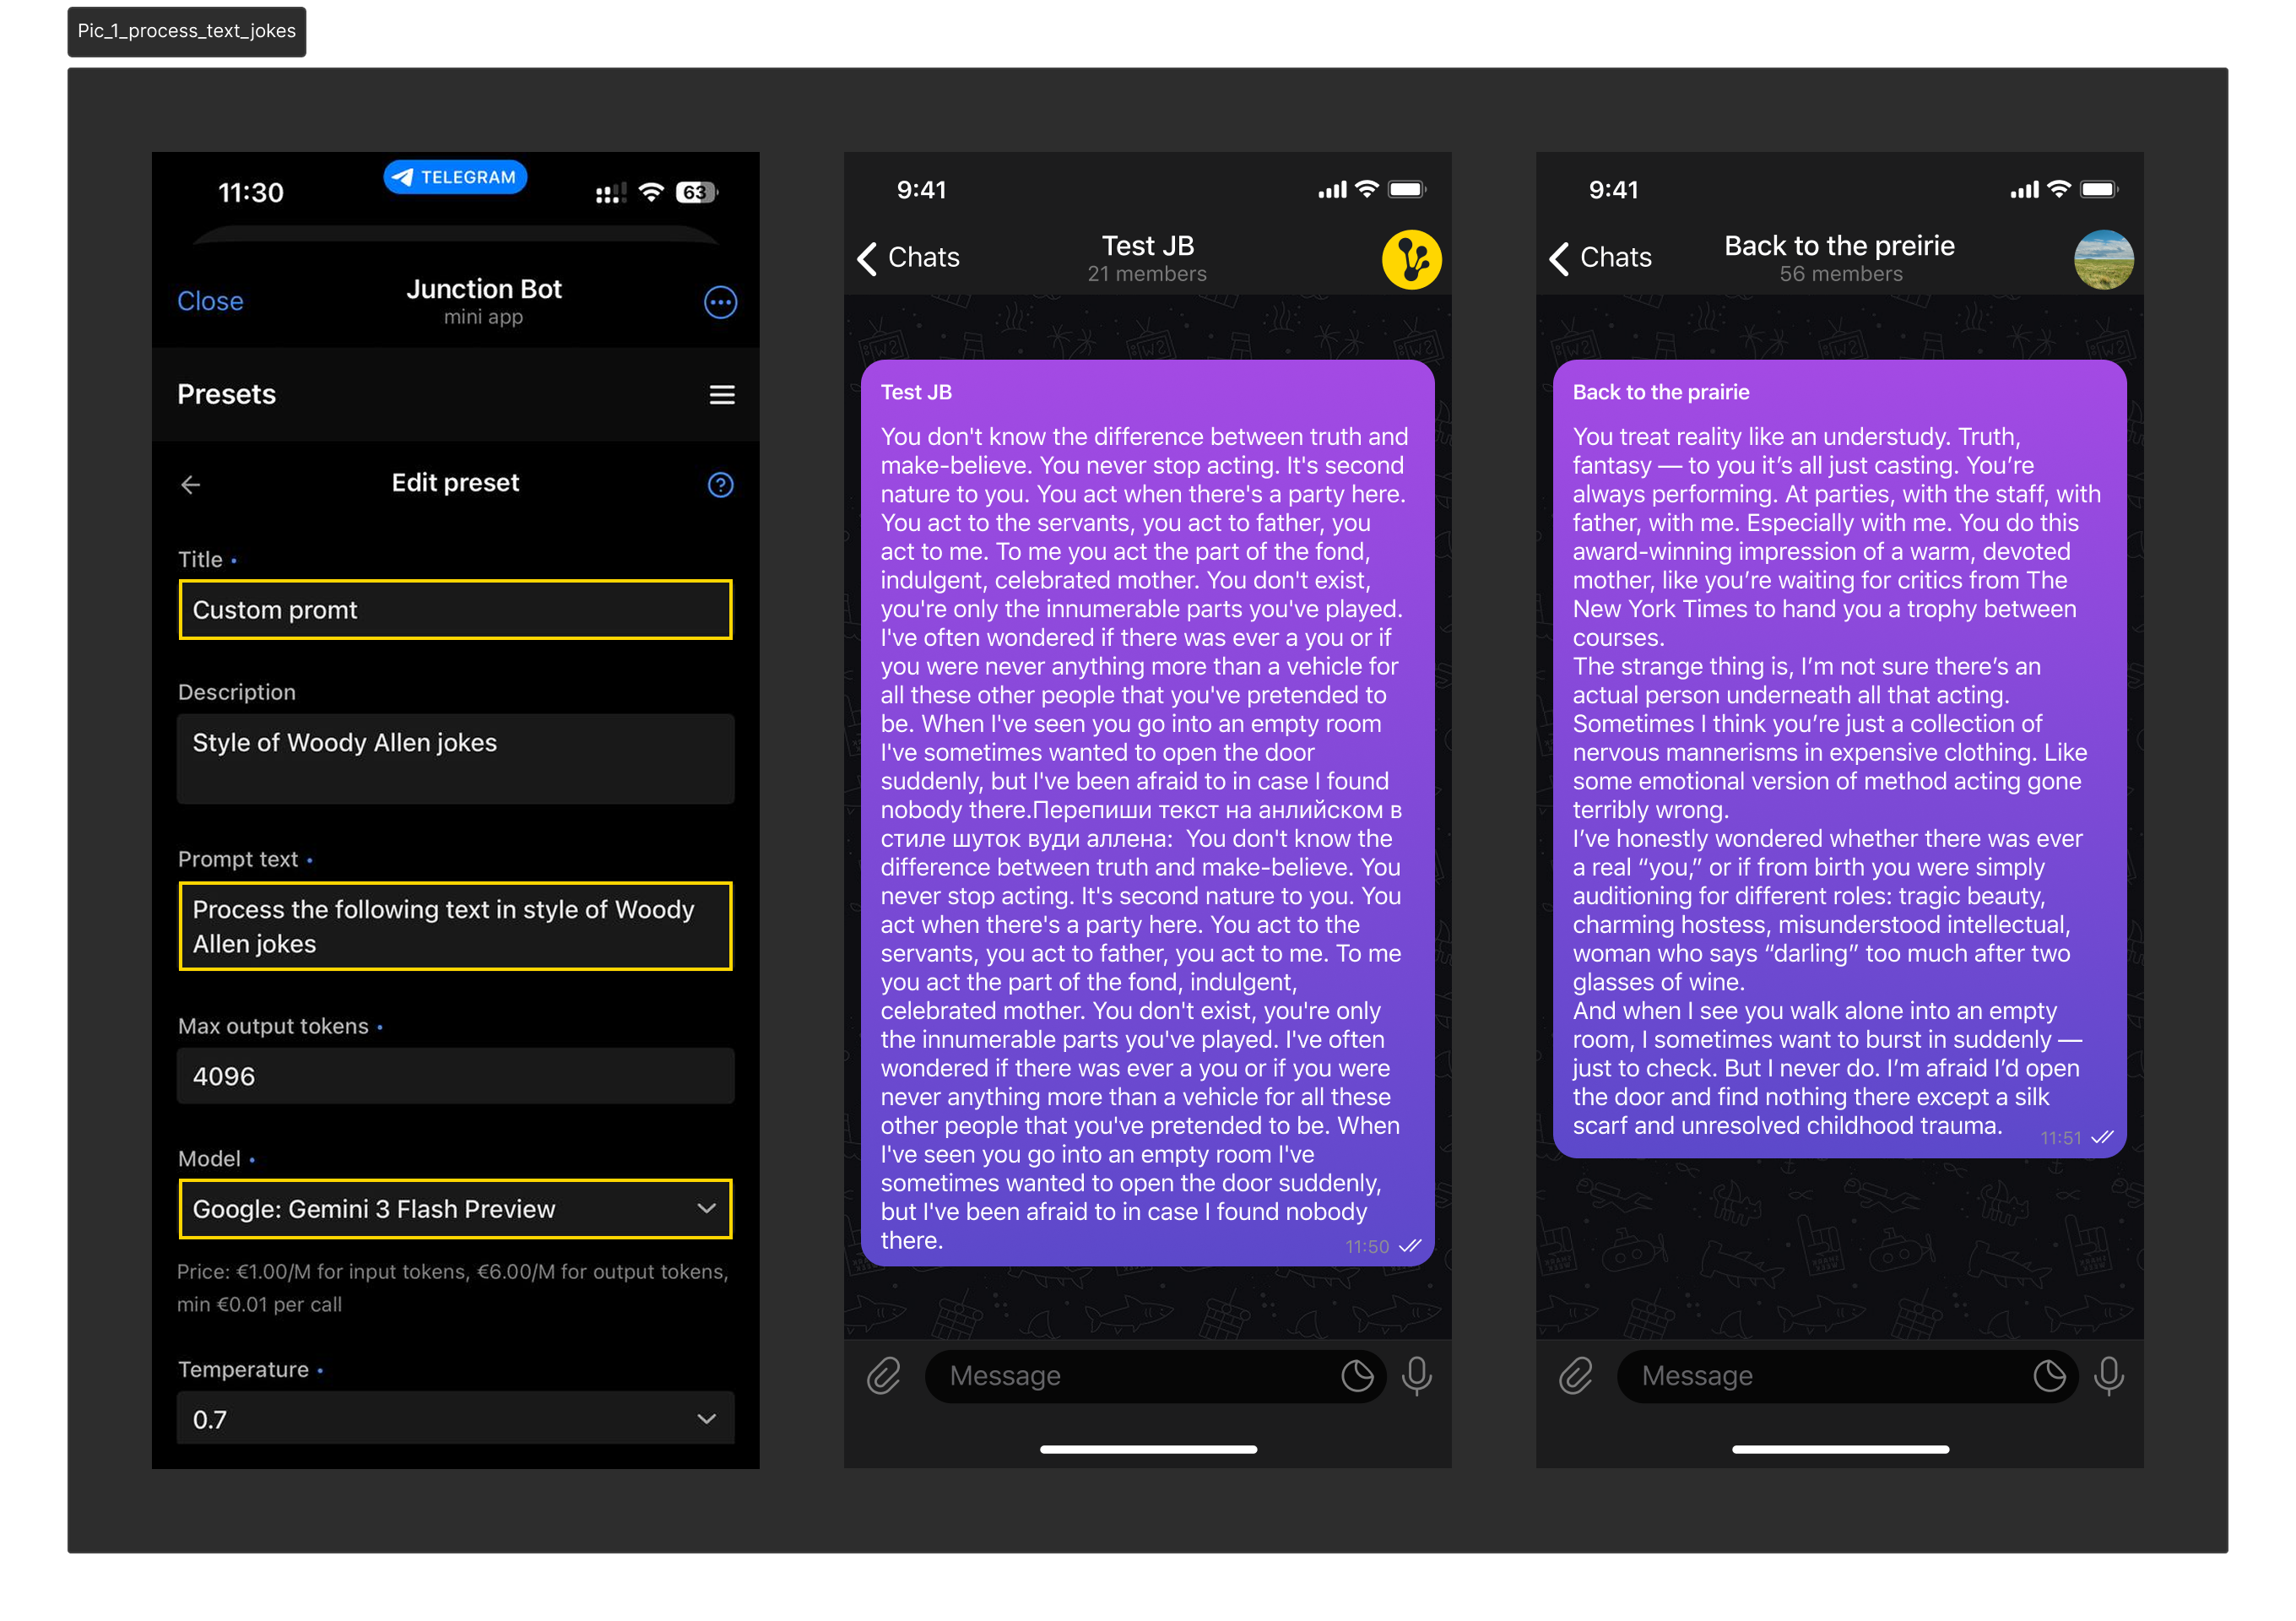
For this example, we used:
Temperature: 0.7
Model: Google: Gemini 3 Flash Preview
Scenario 2: Automatic translation (Multilingual channels)
You can create automatic mirrors for your channel in multiple languages. This is the perfect solution to reach an international audience without the cost of translators.
How it works: you set up copying from the original channel to channels in other languages, and in the integration settings, you specify the appropriate AI instructions.
Example biography translation: We used a simple template spread:
Translate the following text into Spanish:
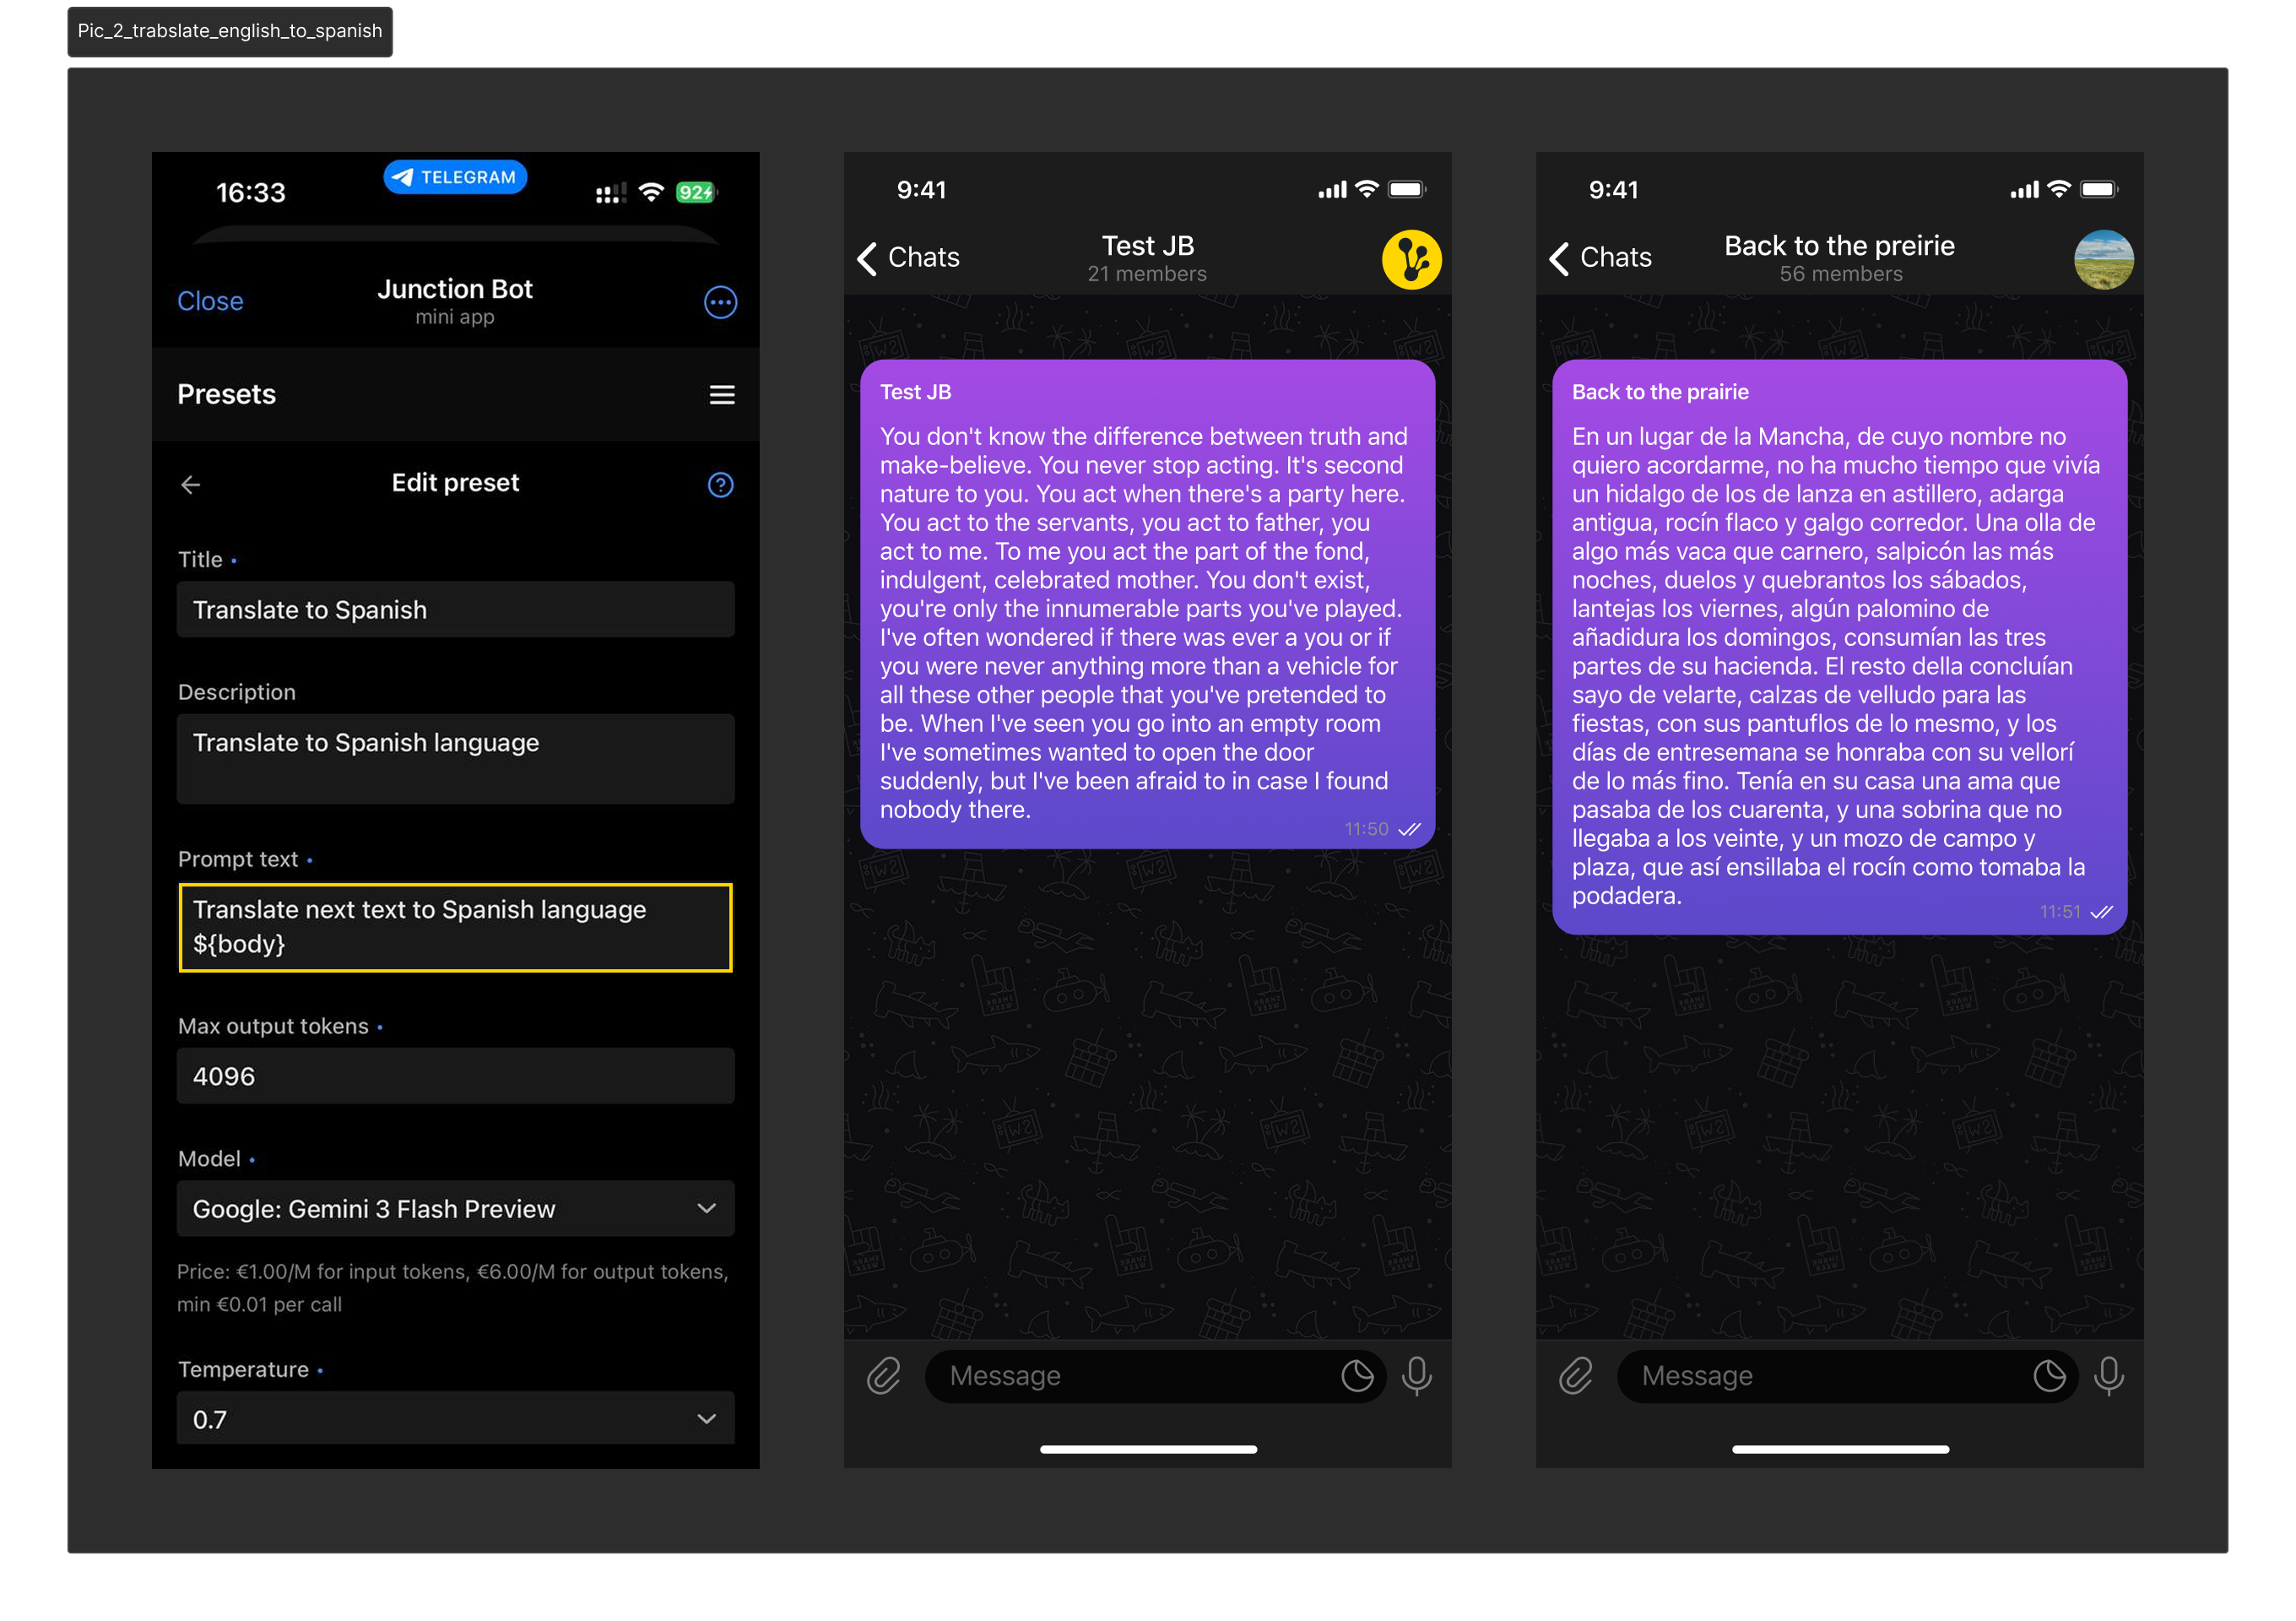
For translation tasks, the model and creativity settings can be left as default.
How do I set up text processing?
- Open Junction Bot in Telegram.
- Open the mini app by clicking the Menu button.
- Go to the “My forwards” section. Do you already have a forwarding rule? Then go to its settings. If not, read how to create a new forwarding rule.
- In the forwarding settings, find and open "Processing AI".
- Select a ready-made template from the library or create your own using the "Create Template" button (more details).
- Press the "Activate" button at the bottom of the screen.
Done! All incoming messages will now be automatically processed according to the screen you select before being sent to a chat appointment.